How to grow Microgreens
I have always been super keen on growing microgreens but never been able to master the perfect harvest until NOW! This summer has been the summer of discovering quick and easy ways to grow LUSH microgreens! And now I want to share it with the world!
Microgreens are incredibly good for you as they are loaded with micronutrients. Just a handful every day sprinkled on salads, vegetables or on their own is a great way to get your vitamin and mineral top up!
I cant wait for you to start sharing your harvest results with me once you master these simple seed-to-plate techniques! So now you ask… HOW??!!
I have two techniques which you can choose from. Both are the same except that you use a different medium to grow your seeds in.
- The Coconut Husk Technique
- The Clay Ball Technique

1. The Coconut Coir/Soil Technique
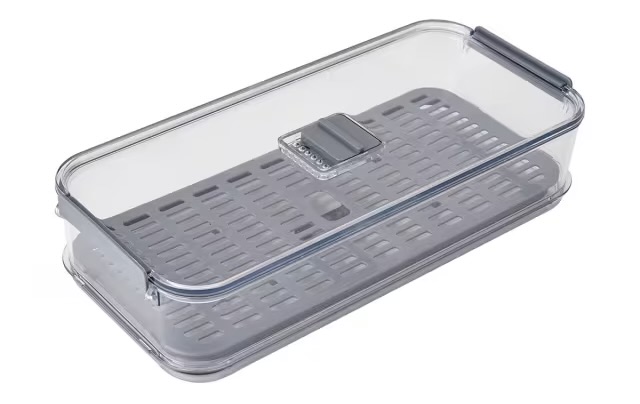
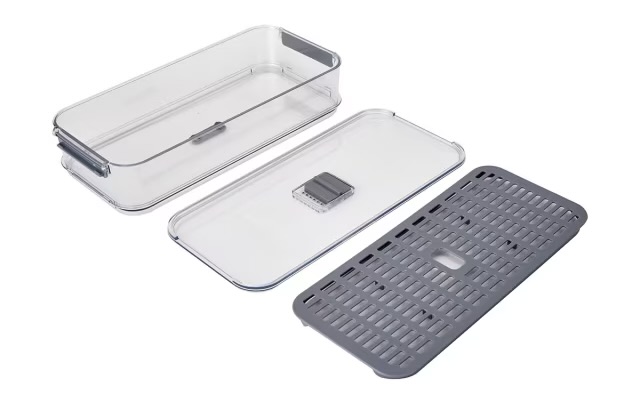
The best container I have found is one I bought from Kmart called “fridge storage” which has an insert to keep the food off the bottom of the container, this acts as a base for the growing medium and allows the roots of the plants to access their water/nutrients at the bottom. Its kind of like a basic form of hydroponics without all the fancy equipment.
There are other containers like this on the market but I have found this one to be the best,
This is the container I buy from Kmart: https://www.kmart.co.nz/product/28l-fridge-storage-43227051/
Microgreen Seeds: I buy mine from Kings Seeds.
They have a fabulous range and you can buy in larger quantities for when you find the ones you really like.
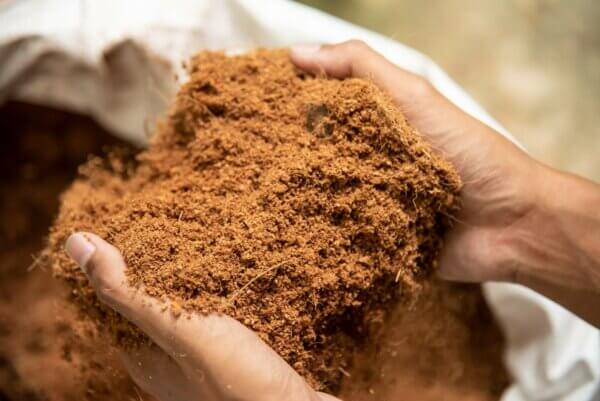
I use coconut coir (husks) and seed raising mix.
Coconut Coir (Husks): can be purchased from Bunnings/Mitre 10 or a hydroponics store and need to be hydrated prior to use - they are cheap and one block will last you for AGES.
Coco coir is the name given to the natural fibre extracted from coconut husks.
If you would like to read more about this amazing substrate please see HERE
Seed Raising Mix: Just a small bag so you can sprinkle this over the top of the coconut husks.
- Spread a thin layer (about 0.5cm) of coconut husk over the surface of the container insert.
- Sprinkle Seed Raising Mix over the coconut coir - just a very thin layer.
- Sprinkle seeds over the top of the seed raising mix, dont be shy here!
- Gently Mist your soil and seeds until they are wet and soaked through the layers, the seeds must be throughly wet.
- Cover your tray with the lid and leave in a shady spot until the seeds have sprouted.
- Mist the seeds and soil at least twice a day.
- Once the seeds have sprouted remove the lid and put them in a sunny spot.
- Fill the base of the container with water through the watering hole. You can also add plant nutrients to your water to optimize the growth of your microgreens.
- NUTRIENTS: You can grow your microgreens with just water but if you want them to be super lush you can add nutrients to the bottom of the container once the roots have sprouted. I use a nutrient from the Hydroponics store. But, you can also use, seaweed juice, worm juice or compost juice but be mindful as these can make your containers smell and this can be unpleasant inside.
- WATERING: Make sure you check the level of the water in the base of the container every day. It needs to cover the base of the container but not submerge the soil. Best to top it up a little each day to ensure the roots of the microgreens have access to water.
- HARVESTING: Microgreens are at their most nutritious when they are at their first leaf stage. Once they start sprouting more leaves they need to be harvested straight away.
- PEA FEATHERS/SPROUTS: These microgreens take a lot longer to sprout but are the gift that keeps giving! Harvest your pea feathers by leaving a small amount of growth at the bottom (closest to the seed) and they will grow again and again!
Let me know if you have any tips or tricks that you have discovered and I can add them in here to share with others!


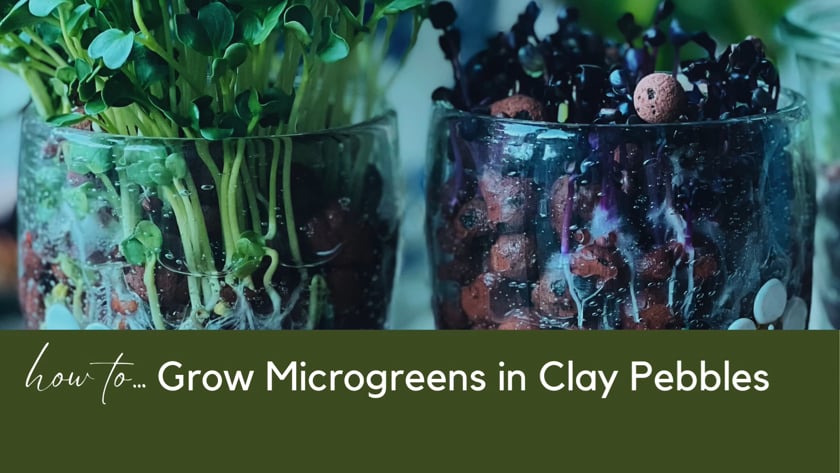
1. The Clay Pebble Technique
You can use almost anything for this technique as long as it is a container that can hold water. I use weck jars as I had a few of these handy and I love being able to see the clay pebbles and the roots of the microgreens.
Microgreen Seeds: I buy mine from Kings Seeds.
They have a fabulous range and you can buy in larger quantities for when you find the ones you really like.
Clay Balls/Pebbles (Leca Balls):
These are fabulous little clay balls/pebbles, or Leca Balls, that can use used to propagate Microgreens. I simply love using these as there is no waste as you can use these magical little balls over and over, rinse and repeat. No soil, no waste!
You can buy a 2L bags of these balls HERE
I buy mine from my local hydroponics store where I get a large box for $15-$20.00.
- Pop you clay balls in a bowl: rinse and hydrate them
- Fill up your growing container/jar with 2/3 clay pebbles.
- Sprinkle your microgreen seeds on top of the hydrated clay balls.
- Mist the seeds until they are saturated.
- Cover the container with a lid.
- Put the container in a dark/shady place out of the direct sunlight.
- Mist the seeds and clay balls at least twice a day.
- Once the seeds have sprouted remove the lid and put them in a sunny spot.
- Fill the base of the container/jar with some water (add nutrients here as well for optimized growth) about 1-2cm below the top clay balls.
- NUTRIENTS: You can grow your microgreens with just water but if you want them to be super lush you can add nutrients to the bottom of the container once the roots have sprouted. I use a nutrient from the Hydroponics store. But, you can also use, seaweed juice, worm juice or compost juice but be mindful as these can make your containers smell and this can be unpleasant inside.
- WATERING: Make sure you check the level of the water in the base of the container/jar every day. Best to top it up a little each day to ensure the roots of the microgreens have access to water.
- HARVESTING: Microgreens are at their most nutritious when they are at their first leaf stage. Once they start sprouting more leaves they need to be harvested straight away.
- PEA FEATHERS/SPROUTS: These microgreens take a lot longer to sprout but are the gift that keeps giving! Harvest your pea feathers by leaving a small amount of growth at the bottom (closest to the seed) and they will grow again and again!
- WASHING THE CLAY PEBBLES: Once you have harvested your microgreens, tip the clay balls out of the jar and rinse/wash the clay balls, then dry them in the sunshine. Reuse as needed.
Let me know if you have any tips or tricks that you have discovered and I can add them in here to share with others!